Source: AN OCTOBER SPICY ODYSSEY
In conversation with…..
In conversation with…..Upma from Dhaba Lane
Finally, a escape to the City on a little foodie expedition!
First stop, ‘Dhaba Lane’ – and no, this is not a name of a street but actually a quirky little desi cafe, currently tucked away in the basement of 87 Leonard Street, which you could be forgiven for almost walking past.
However, I was definitely making a stop after having read so many great reviews about the company and its food.
A knock on the door and I am greeted by the lovely Upma who I follow down to the basement, where I am met with the unpretentious 1960s deco of the cafe. But it’s all about the food here and I was lucky enough to get a little taster of their infamous paneer paratha and salad, and a healthy dose of foodie convo over mango lassi with Umpa – cofounder of Dhaba lane with her friend Arti.
I loved how our conversation dove straight into our favourite desi dishes when at home and reflected on how UK curry houses failed to do the cuisine justice in both taste and variety.
This young company has an instant appeal for me with its desire to challenge the British preconceptions and palates by showcasing real Indian/Pakistani food
Dhaba Lane’s passion to bring tasty, healthy food to the masses resonates with both the cook and nurse in me. Especially, with obesity being a hot topic in both media and medical circles, putting our lifestyles and diet under even closer scrutiny.
This duo definitely appears to have found a niche in the London lunchtime market by providing fresh desi food with a twist to the city-goers.
Personally, I loved the delicate balance of flavours in the paneer paratha and the crunchy fresh salad with the added zing of the tamarind chutney. Definitely a place I would recommend to try out – the food is easy on your stomach and your pocket! Find out more about Dhaba Lane at http://www.dhabalane.com.
I am going back to try out their meat curry on my next trip to the Capital – which for an added bonus are halal!

Spicy beans on toast!

Happy Easter everyone 🐥
Here’s a little twist on an old British classic to spice up your Sunday.
Most of us have a can of baked beans sitting in our cupboard. It was certainly an affordable staple for me at university. But I always found it a bit bland for my particular pallet, so it got a little chilli makeover from moi.
The great thing about this dish is that all ingredients are readily available. It’s easy to assemble even for the novice cook amongst us. And just one additional ingredient lifts the flavours of this dish but still keeps it healthy!
Happy cooking 😊
Ingredients
1 can of baked beans
Margarine for spread
1 or 2 slices of bread of your preference
1 or 2 green chillies finely chopped
Salt to taste
1. Empty the required amount of beans into a frying pan and start to warm through on a medium heat.
2. Add in desired amount of fresh green chillies to pan. Stir intermittently and allow both ingredients to cook together for 1-2 minutes.
4. Toast bread in toaster or under the grill until browned on both sides
5. Spread margarine to toast slices and spoon on the spicy baked beans mix evenly
6. Sprinkle with salt as required and serve immediately.
My blog 2014 in review
The WordPress.com stats helper monkeys prepared a 2014 annual report for this blog.
Here’s an excerpt:
A San Francisco cable car holds 60 people. This blog was viewed about 580 times in 2014. If it were a cable car, it would take about 10 trips to carry that many people.
BOOK REVIEW SUPPERCLUB
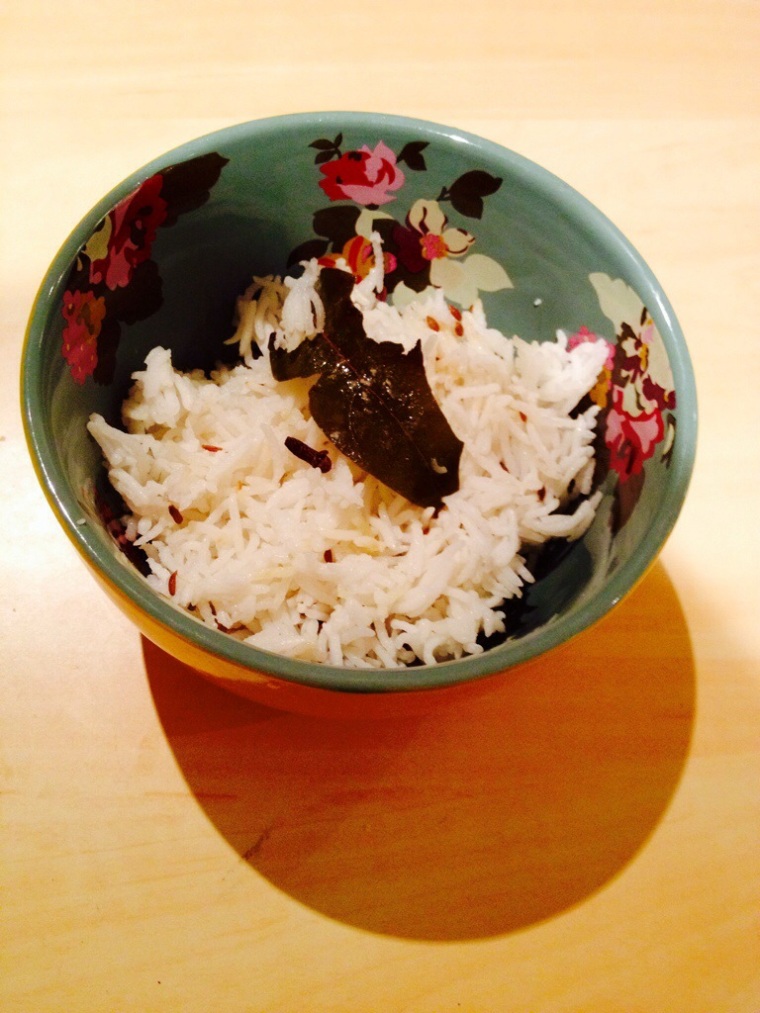
Jeera Basmati Rice
Ramadhan Mubarak everyone.
I’m back with an easy, yet aromatic rice dish for you to try out which serves as a great accompaniment to both meat and vegetarian curries.
By combining a careful selection of whole spices with plain basmati rice you too can producing delicious results from your own kitchen – and the best thing is that this dish is super healthy too.
Try for yourself. Happy cooking 🙂
Ingredients
1 cup Basmati rice (I used Laila Basmati)
1 1/2 cups hot water
Salt to taste
2-3 whole green cardamoms
2 whole cloves
1 bay leaf
1 tsp cumin seeds
1 tbsp (cooking) olive oil
1. Add the rice to a bowl and cover with cold water. Leave to soak for 1/2 hour, then rinse the rice throughly to remove the excess starch. Once the water runs clear, drain the rice and set aside.
2. In a pan add in the oil and whole spices and sauté over on a medium-high flame until the spices begin to release their aroma.
3. Stir in the rice, followed by hot water and salt. Cover the pan with a tight fitting lid and allow the rice to come to the boil.
5. Reduce to a low heat and allow rice to soak up the water (approx 5-6 mins depending on the rice).The rice will be ‘al dente’ at this stage. To achieve the long grain rice DO NOT stir the rice.
6. Dampen a tea towel and wrap the lid in it and cover the rice again. This process steam cooks the rice. Leave the rice on low heat for a further 5 mins or until the rice is cooked.
7. Serve the rice hot and enjoy with a meat or vegetarian curry of your choice or with some raita.
Chapati Junction
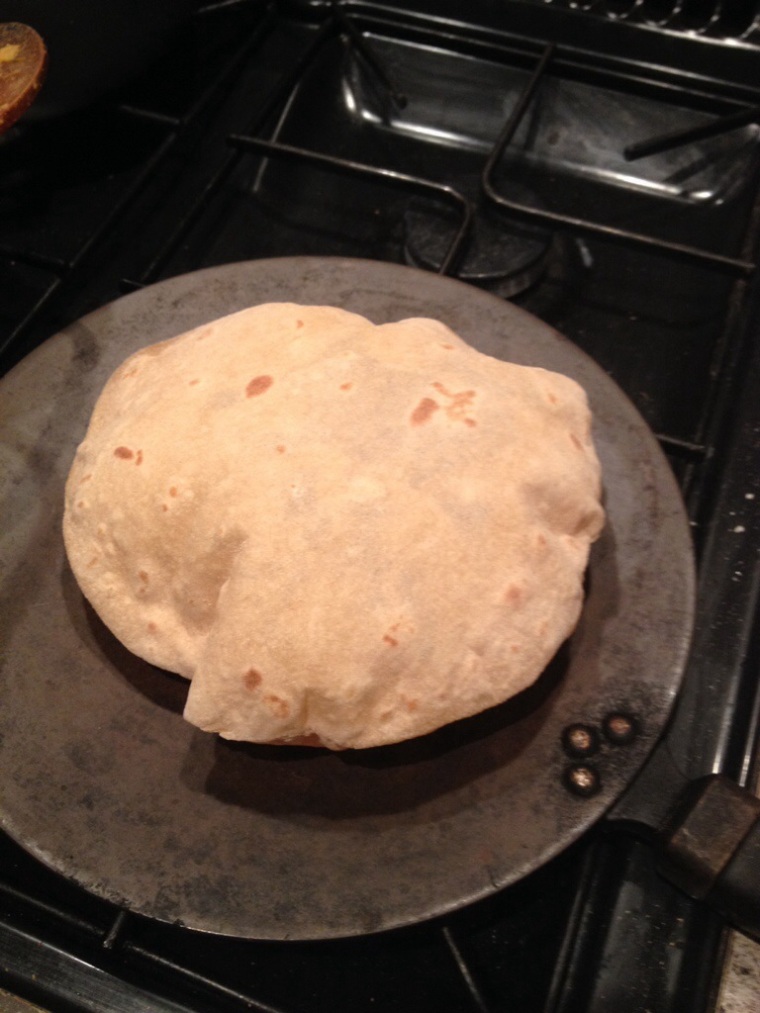
If there ever is anything that I look forward to when coming home it’s eating freshly made hot soft chapatis – straight from the tawa (skillet) to the plate. In our house, these get gobbled up pretty quickly and the best thing is that they are so easy to make. So much so that it was the very first thing I learnt to make from my Ammi.
For those who are not in the know-how, chapatis or rotis are our equivalent of bread and are made daily in most Asian households around the world. Phulkha is the term we give when the chapati completely puffs up when cooked over a direct flame. The best part of the cooking and my mission to perfect! This cooks the chapati through, making it soft and digestible.
We make these delicious flatbreads in our house using whole wheat chapati flour known as ‘atta’ which means that they are super healthy too – being nutritionally high in fibre and low in fat.
Follow the recipe below and enjoy the yummy results for yourself… Happy Cooking 🙂
Makes 8 chapatis/rotis
1 cup good quality atta – I used Chaki Atta
A pinch of salt
1/2 cup luke warm water
Spare atta (flour) for rolling
1. Making the atta dough: In a wide shallow bowl, add in the atta and salt and then create a ‘well’ in centre of this mix.
2. Add half the water to the ‘well’. Gradually mix in the flour from the sides to the water in the centre to begin creating the chapatti dough. At this stage the dough mix will still be dry. Gradually add the remaining water a little at a time until all the dry ingredients combine to form a soft dough mix.
3. Knead the dough for 5-10 minutes until it is soft and smooth.
4. Cover the dough with cling film or a wet tea towel and leave aside for at least 30 minutes to help the gluten to relax and makes the dough more pliable when rolling out.
5. Now let’s get rolling! Divide dough into 8 equal sized dough balls.
6. Take the first dough ball and roll out on lightly floured surface round into the classic thin chapati circle. Make sure to roll evenly on all sides and not to coat with too much flour as this will burn the chapati during the cooking process.
7. Heat up the tawa/skillet/wide based frying pan on a high. Once hot, reduce the flame to medium-high, place the chapati on the tawa and watch as tiny bubbles start to form on surface of chapati.
8. Flip the chapati over to allow the other side to cook until you notice surface bubbles on the other side too.
9. At this stage you could continue to cook the chapati on the tawa, allowing it to puff up or remove the chapati off the tawa and place over the direct flame. Chapati will start to puff up immediately – this is the phulkha stage. You will notice golden brown spots appear on the chapati surface. Using round-ended tongs turn the chapati over and let the other side puff up. Be careful not to break the chapati as the hot steam released can be scalding. Children and teenagers should avoid the direct flame cooking technique themselves and ask for the help of an adult.
10. Once cooked, brush the chapatti with some oil or melted butter and wrap in a clean tea towel or foil and keep warm for serving. I place my wrapped chapatis into a metal lined ‘hot pot’ whilst I cook the rest.
11. Once you have finished making all the chapatis, serve them immediately with your favourite curry or you could use them as a wrap with a filling of your choice.
THE HUMBLE ALOO GOBI!
So my weekend plans are cancelled and I am left house bound in this stormy weather!! But typically all I can think of is what can I cook for myself today. As I contemplate about dinner, here’s a veggie treat for you all.
Often reserved as a side dish on restaurant menus, aloo gobi (potato and cauliflower) can easily get overlooked. However, this is a delicious and filling vegetarian dish in its own right and a definite family favourite of mine.
The dish may sound complex, but is actually very easy to make at home. Try for yourself. Enjoy!
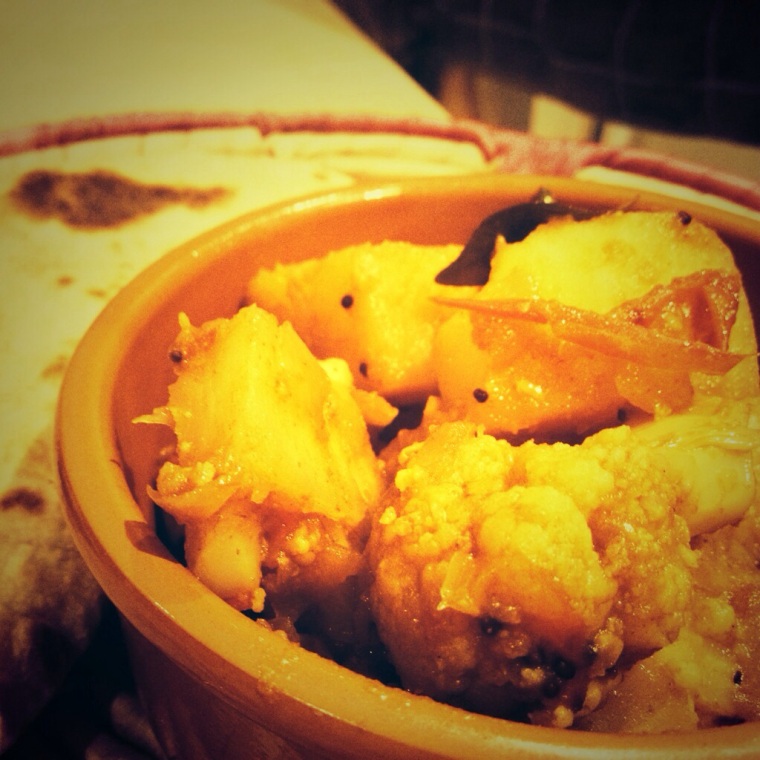
INGREDIENTS
1 small cauliflower head, cut into medium florets
2 medium white potatoes, peeled and cut into 6 even pieces – avoid floury potatoes
1 medium onion, finely chopped
3 medium tomatoes, finely chopped
1 tsp fresh ginger, coarsely chopped
3 garlic cloves, crushed
8 dried curry leaves
1 tsp mustard seeds
A pinch of asafoetida powder (optional)
1 1/2 tsp fenugreek leaves, crushed
1 tsp coriander powder
1/2 tsp turmeric powder
salt & chilli powder to taste
2 tbsp vegetable oil
1/2 glass cold water
1 fresh red chilli, sliced
1 tbsp fresh coriander leaves, chopped
PREPARATION
1. Pour the oil into a wide based pan, on a high heat. Add in the mustard seed and watch them sizzle and pop with a minute.
2. Immediately stir in the onions and allow to soften on a medium-low heat until they become golden brown. Mix in the ginger, garlic and curry leaves and stir-fry for a minute.
3. Add in the tomatoes, followed by salt, chilli powder, asafoetida, coriander powder, turmeric, fenugreek leaves and sauté for a further 2 minutes.
4. Now mix in the potatoes and stir fry for 5 minutes before adding in the cauliflower florets. Make sure the potato and cauliflower pieces are evenly coated with the sauce.
5. Pour in the water, bring the mixture to a simmer before covering the pan with a lid and reducing the heat to a low.
6. Allow the potatoes and cauliflower to cook, stirring occasionally to prevent the mixture from sticking. This can take up to 25 -30 minutes depending on the vegetables.
7. Stir the fresh chillies in 5 minutes before taking the Aloo gobi off the heat.
8. Garnish with fresh coriander leaves and serve this yummy dish with roti, naan or plain basmati rice.
This dish is also great as a wrap filling with homemade green chilli chutney (recipe to follow soon) and salad.
Tip: Aloo gobi tastes even better the next day. It can be kept refrigerated for up to 2 days or frozen once cooled and used up within the month.
Any left overs can be mashed slightly and used as a filling for stuffed parathas. Delish!
TUNA PASTA SPICED UP!
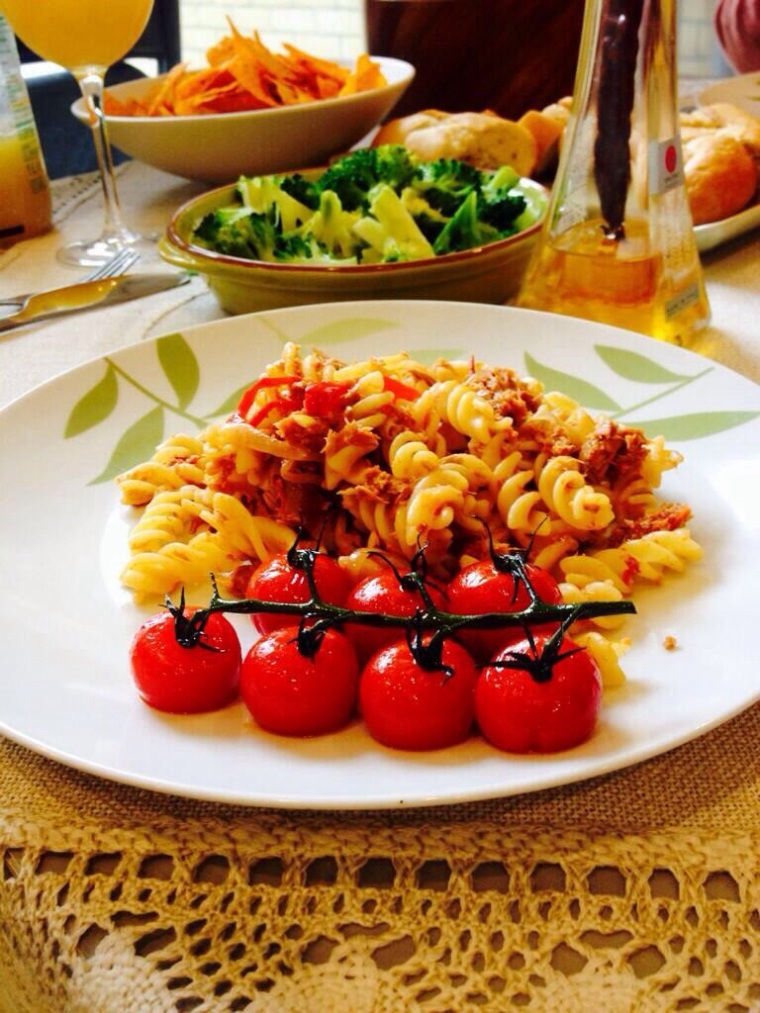
I love this recipe! So simple yet so delicious and quite impressive when you have friends round.
During a weekend away whilst visiting friends, this recipe came to my rescue when our lunch plans were hampered by the recent stormy weather. I found myself raiding my friend’s kitchen for supplies, and with a quick dash to her local food store for some little extras, lunch was served. Enjoy!
INGREDIENTS
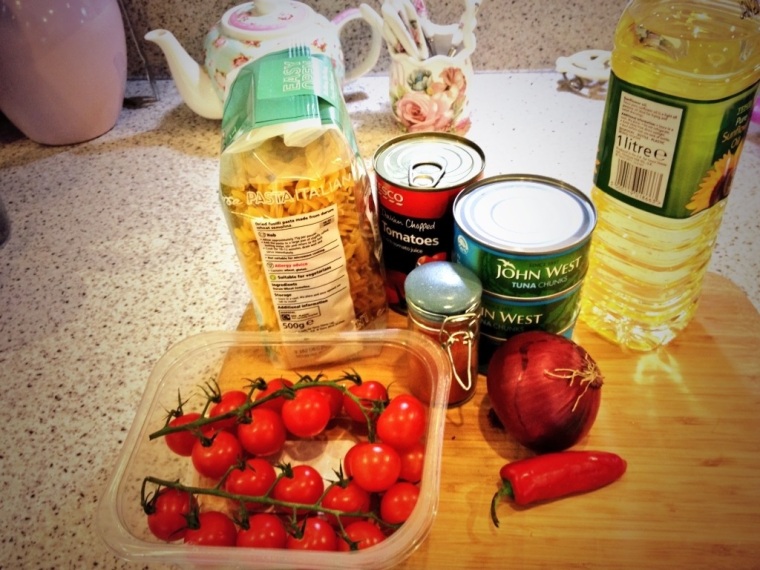
2 small cans of tuna in spring water, drained
1 can chopped tomatoes
1 red onion sliced
2 garlic cloves crushed
3 tbsp olive oil
salt and chilli powder to taste
1 fresh red chilli sliced (optional)
1 pack of cherry tomatoes of the vine
250gm uncooked pasta of your preference – I used fusili but penne, linguini or conchiglioni pasta would also go well with this dish
PREPARATION
1. Cook the pasta: Place the pasta in large pot of boiling, salted water and cook until ‘al dente’ (follow the packet instructions). Drain the pasta and reserve back half a cup of the pasta cooking
water.
2. Make the tuna sauce: Heat 2 tbsp of oil in a wide pan. Add in the sliced onion and saute gently for 5-6 minutes on a medium heat until they soften and start to brown.
3. Now add in the crushed garlic, salt, chilli powder and stir for a further minute.
4. Mix in the canned tomatoes and turn the heat up to high. Flake in the tuna, stir, and allow the mixture to come to a bubbling boil. Now reduce the heat to a medium-low to allow the sauce simmer for 15 minutes to allow all the flavours to combine.
5. Make sure to taste the sauce at the simmering stage and adjust the reasoning if required. If the sauce is too dry for you then add in some the earlier reserved paste water until the sauce reaches your desired consistency.
6. Stir the fresh red chillies into the sauce during the last 5 minutes of the cooking process if like me you want add and extra kick to you pasta sauce.
7. Once cooked, take off the heat and toss the pasta and tuna sauce together gently.
8. Pan fry the cherry tomatoes: In a frying pan, heat up 1 tbsp olive oil and add in the cherry tomatoes on their vine. Allow to cook in a medium-high heat until they soften for about 2-3 minutes.
9. Plate up: Serve the tuna pasta and cherry tomatoes with garlic bread and a salad or steamed vegetables of your choice.
SIMPLY HOMEMADE SPICY CHICKEN TIKKA CURRY
Nothing beats a good chicken curry but if that conjures up an image of a few pieces of chicken in thick, dark oily sauce as seen in some indian restaurants, then let me burst that bubble for you right away.
A truly homemade chicken curry can be light, flavoursome and healthy.
As a few of you have been in touch asking for an easy curry recipe, I have decided to take the infamous chicken tikka curry and break it down for you in a step-by-step guide. Happy cooking!
4 chicken breasts skinless and boneless
2 medium onions, coarsely chopped
salt to taste
3 medium tomatoes or 2/3 can of tinned tomatoes (400g size)
2-3 garlic cloves crushed
1tsp ginger coarsely chopped
1 red chilli sliced
1/2 – 1 tsp chilli powder as per taste
1/2 tsp paparika powder
1/2 tsp turmeric powder
1/2 tsp cumin powder
1 tsp garam masala powder
250mls chicken stock or water (optional)
3 tbsp vegetable oil
CURRY PREPARATION GUIDE
1. Cut the chicken breasts into bite size pieces and place aside in a bowl.
2. Pour the oil to a deep cooking pan – I used a non-stick pan. Heat the oil on a medium-high heat (careful not to let the oil burn) and add in the onions and stir fry for 5-6 until light golden brown.
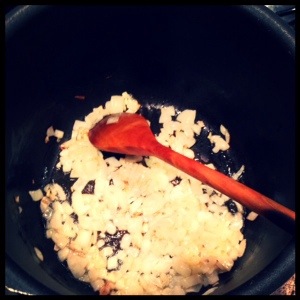
3.Mix in the garlic and ginger and cook for a further minute. Now add in the paprika, turmeric, cumin powder, salt and chilli powder to taste and cook for a further 15- 20 seconds.
4. Stir in the chopped tomatoes and reduce the heat to allow the tomatoes and spices to blend and cook for 10 minutes. Add some water to the mix if you notice the mixture sticking to the pan.

5. Return the mixture back to a medium-high heat and add in the chicken pieces. Stir fry the for 5 minutes to coat the chicken in the spicy sauce.
6. At this stage you can add in hot chicken stock or water. However, I fancied a drier curry on this occasion so I moved straight onto step 7.
7. Bring the curry to a simmer, then leave on a low heat for 10 minutes until the chicken is cooked.
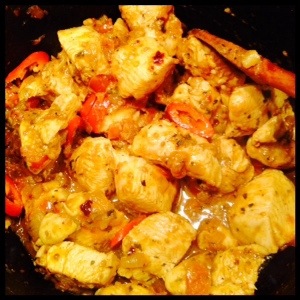
8. To finish, stir in the chopped red chillies and garam masala and take the curry of the heat.
Serve hot with rice or chappatis. I served mine with Zeera (cumin) pilau rice and raita.


